
When hip muscles can’t support your pelvis properly, simple movements like walking, climbing stairs, or standing from a chair become harder and often uncomfortable. These eight targeted exercises address the strength and mobility issues that matter most for pain-free daily movement.
- Why hip strengthening prevents injuries and daily pain
- How weak hip muscles contribute to lower back and knee stress
- Which daily activities reveal your hip stability levels
- 8 hip exercises grouped for progressive routine building
- Foundation moves: glute bridge, clamshell, and lateral walks
- Intermediate control drills: fire hydrant and hip hinge
- Advanced hip mobility drills: 90/90 stretch, single-leg deadlift, and curtsy lunge
- Safety limits when performing hip mobility drills
- When hip exercises increase rather than reduce pain
- Recovery timing and intensity adjustments for sensitive joints
- How many days per week should I perform hip strengthening routines?
- Can hip mobility drills improve athletic performance beyond injury prevention?
- What distinguishes effective hip exercises from generic stretching routines?
Why hip strengthening prevents injuries and daily pain
How weak hip muscles contribute to lower back and knee stress
When the glutes and deep hip abductors can’t hold the pelvis level during single-leg tasks—stepping onto a curb, walking, climbing stairs—the unsupported side drops. This forces the lower back to compensate and the knee to collapse inward. Over time, this pattern can create chronic lower-back aching and knee irritation, particularly around the kneecap.
Which daily activities reveal your hip stability levels
Three simple checks show whether targeted hip strengthening might help:
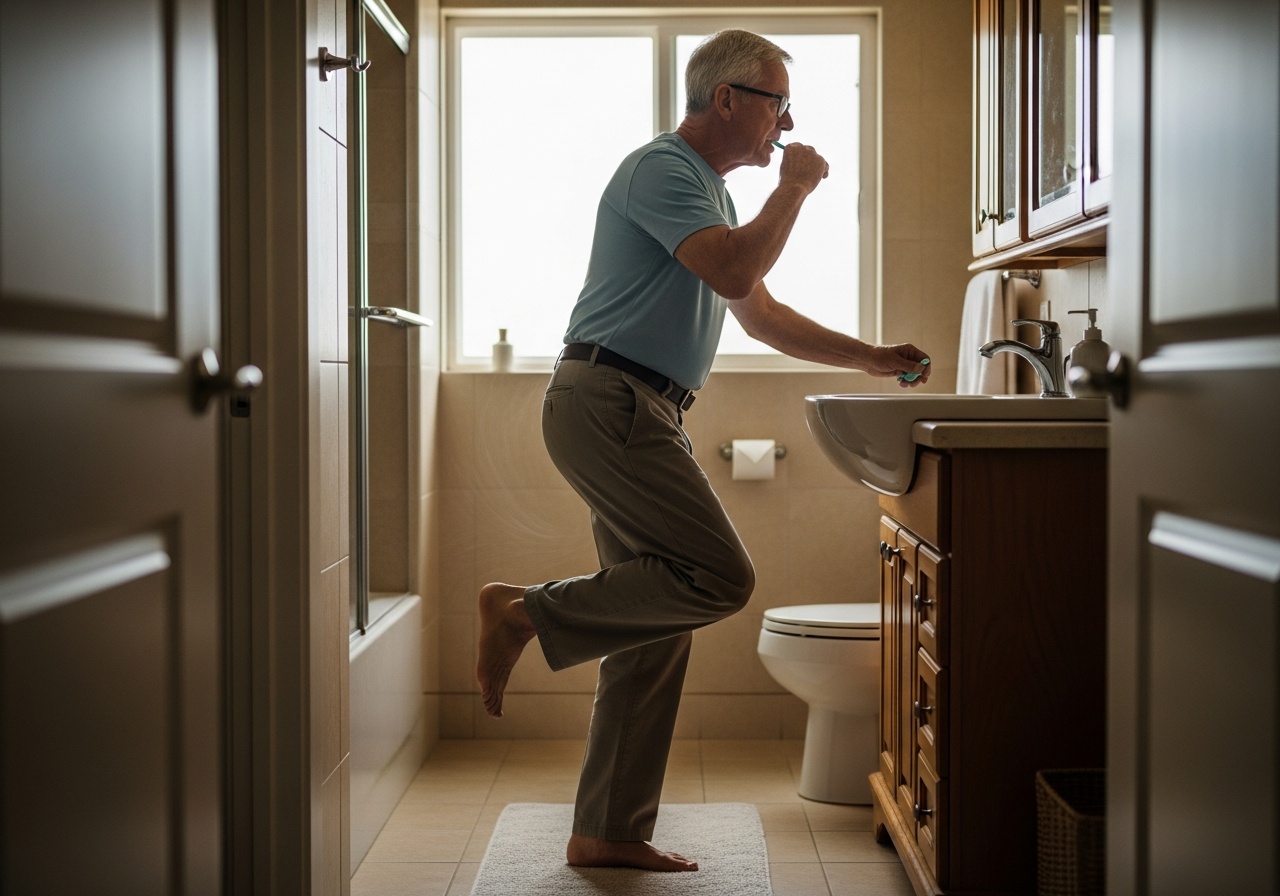
- Stand on one leg while brushing your teeth—wobbling or immediate fatigue indicates weak abductors
- Rise from a low sofa without using your hands—difficulty signals limited hip extension strength
- Walk uphill or climb stairs—excessive hip sway or inward knee collapse points to control deficits
8 hip exercises grouped for progressive routine building
Foundation moves: glute bridge, clamshell, and lateral walks
These three low-load drills teach the posterior chain and lateral stabilizers to work together:
- Glute bridge – Lie on your back, knees bent, feet hip-width apart. Press through your heels and lift your hips until your body forms a straight line from shoulders to knees. Hold 2 seconds, lower with control. 2 sets of 12 repetitions.
- Clamshell – Lie on your side, knees bent about 45 degrees, feet together. Keep feet touching and lift your top knee like opening a clamshell. Lower slowly. 2 sets of 15 repetitions per side.
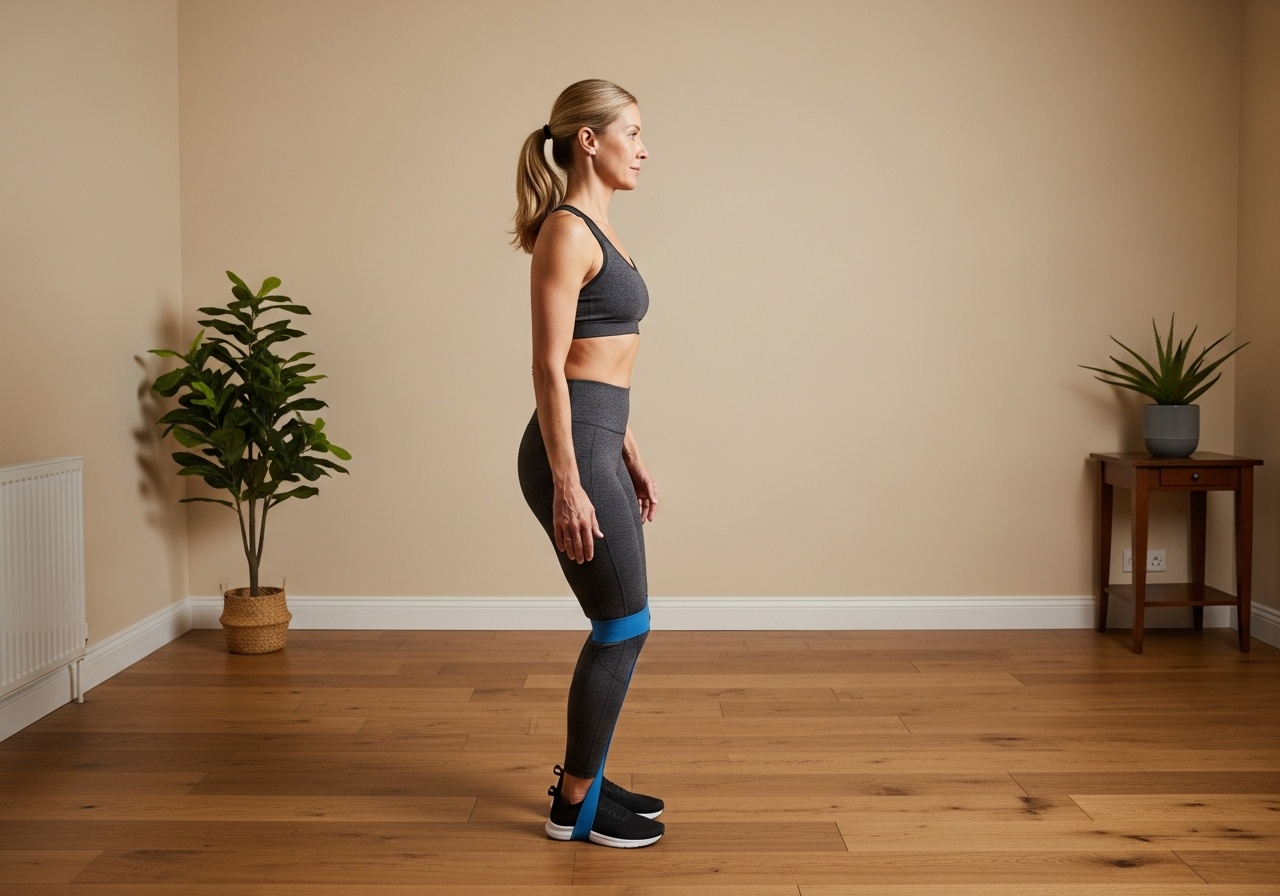
- Lateral band walks – Place a resistance band above your knees. Step sideways 10 steps in each direction while maintaining constant tension. 2 sets.
This trio forms a basic glute-hip workout that builds endurance without aggravating sensitive joints.
Intermediate control drills: fire hydrant and hip hinge
Add complexity once foundation moves feel manageable:
- Fire hydrant – Start on hands and knees. Keeping your knee bent, lift one leg out to the side until your thigh is parallel to the floor. Lower with control. 2 sets of 12 repetitions per side.
- Supported hip hinge – Stand facing a wall or chair for light support. Shift weight to one leg, hinge forward at the hips while extending the free leg behind you. Keep your back flat and pelvis level. 2 sets of 8 repetitions per leg.
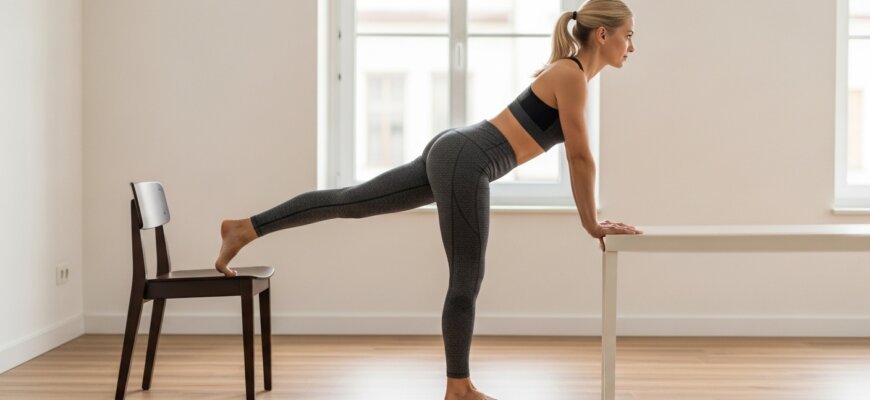
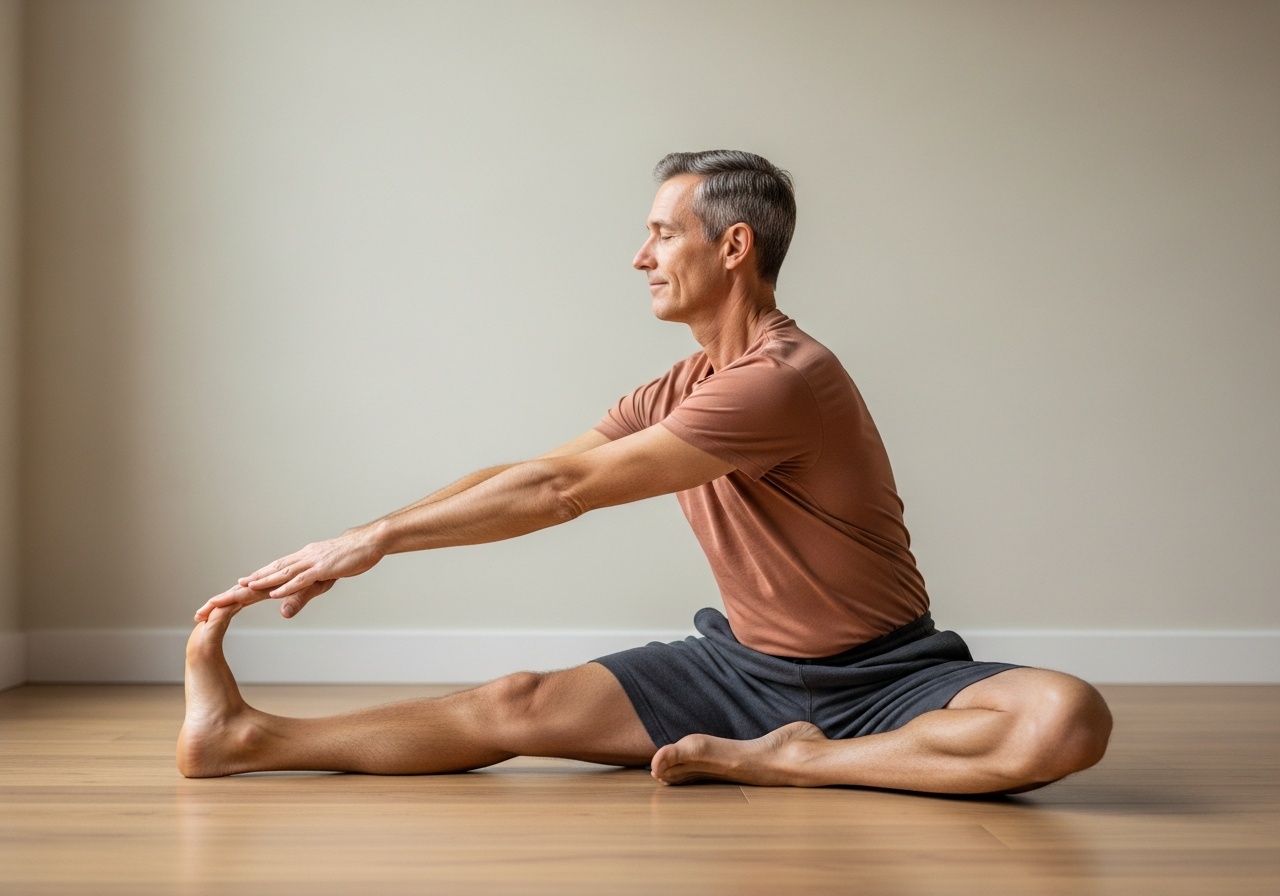
Advanced hip mobility drills: 90/90 stretch, single-leg deadlift, and curtsy lunge
Once earlier drills feel solid, these three demand more control through larger ranges of motion:
- 90/90 hip stretch – Sit with one leg bent 90 degrees in front, the other 90 degrees to the side. Keep your torso upright and lean forward over the front leg for 30 seconds. Switch sides. 2 rounds each side.
- Single-leg deadlift (bodyweight) – Stand on one leg. Hinge at your hips, reaching your opposite hand toward the floor while your free leg extends behind you. Keep your pelvis level throughout. 2 sets of 8 repetitions per leg.
- Curtsy lunge – From standing, step one foot diagonally back behind the other leg, lowering into a lunge. Push through the front heel to return to standing. 2 sets of 10 repetitions per side.
Together, these eight movements address the strength, stability, and mobility needed for hip injury prevention and improved daily function.
Safety limits when performing hip mobility drills
When hip exercises increase rather than reduce pain
Sharp or radiating pain during a repetition, or a dull ache that lingers more than an hour after your session, suggests the load is too high or the joint is irritated. Mayo Clinic recommends stopping the offending movement and reassessing your approach. Pain that spreads down your leg, causes locking, or creates instability warrants medical review before continuing.
Recovery timing and intensity adjustments for sensitive joints
Mild soreness that resolves within 24 hours is normal. If it persists, add an extra rest day between sessions. For ongoing discomfort, reduce band resistance, limit range of motion on stretches like the 90/90, or replace single-leg deadlifts with the supported hip hinge using a chair. Progress only when you can complete a full set without pain.
How many days per week should I perform hip strengthening routines?
Three non-consecutive days—such as Monday, Wednesday, and Friday—allows muscle adaptation while giving your nervous system time to consolidate movement patterns. Avoid training on back-to-back days when starting out.
Can hip mobility drills improve athletic performance beyond injury prevention?
Better hip rotation and extension can translate to more efficient running strides, deeper squats, and smoother lateral movements, which may improve speed and power output. These benefits typically appear after several weeks of consistent practice.
What distinguishes effective hip exercises from generic stretching routines?
Effective hip mobility drills combine load—bodyweight or resistance band—with controlled movement through the hip’s functional range. Passive stretching alone doesn’t teach your muscles to stabilize the joint under load, which is what daily tasks and sports demand.
Start with the foundation trio, notice how your body responds, and layer in more advanced drills as your control improves. Three focused sessions per week will produce more lasting results than occasional intense workouts. If pain increases or persists, scale back the intensity or consult a physical therapist to adjust your approach.